
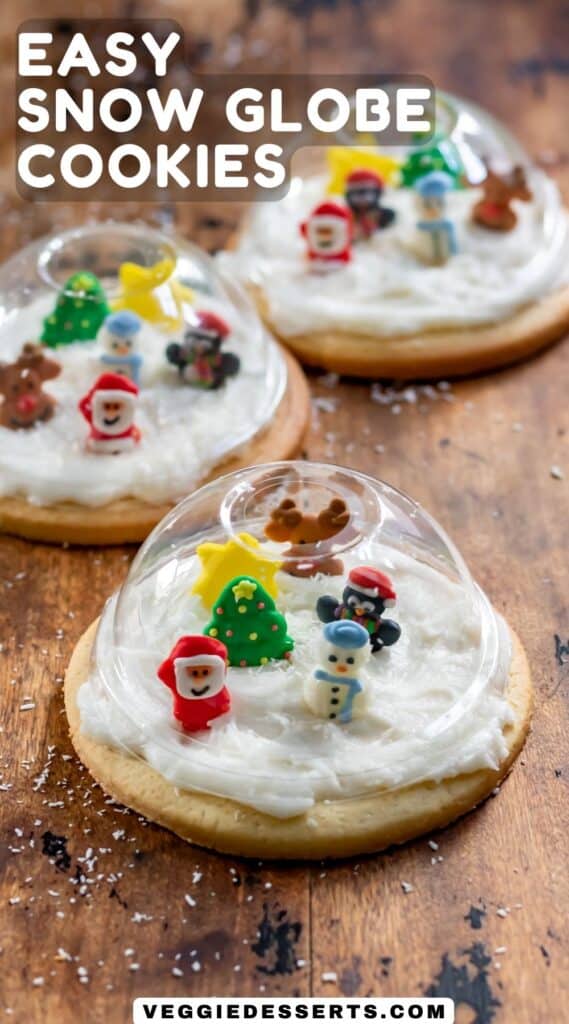
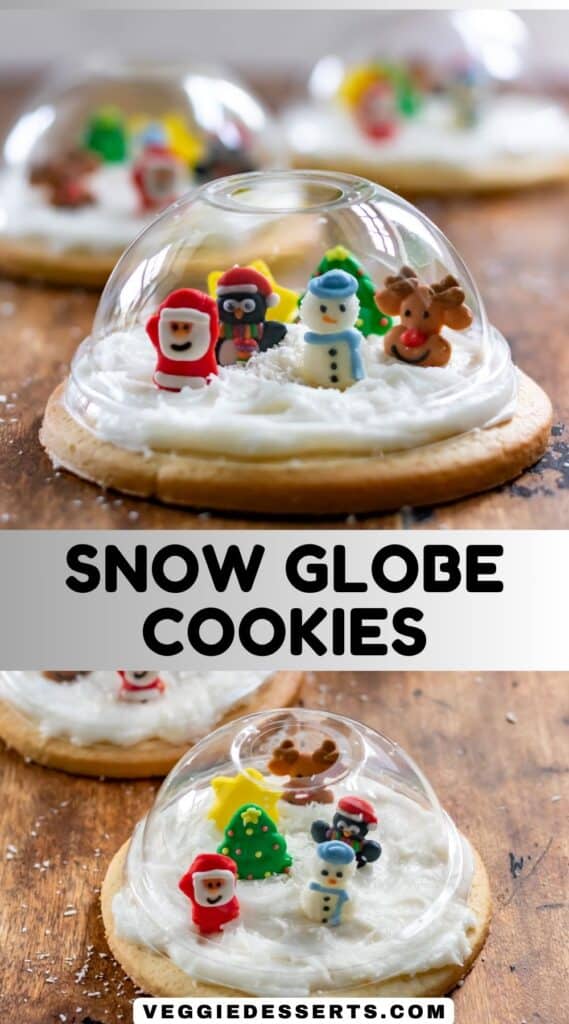
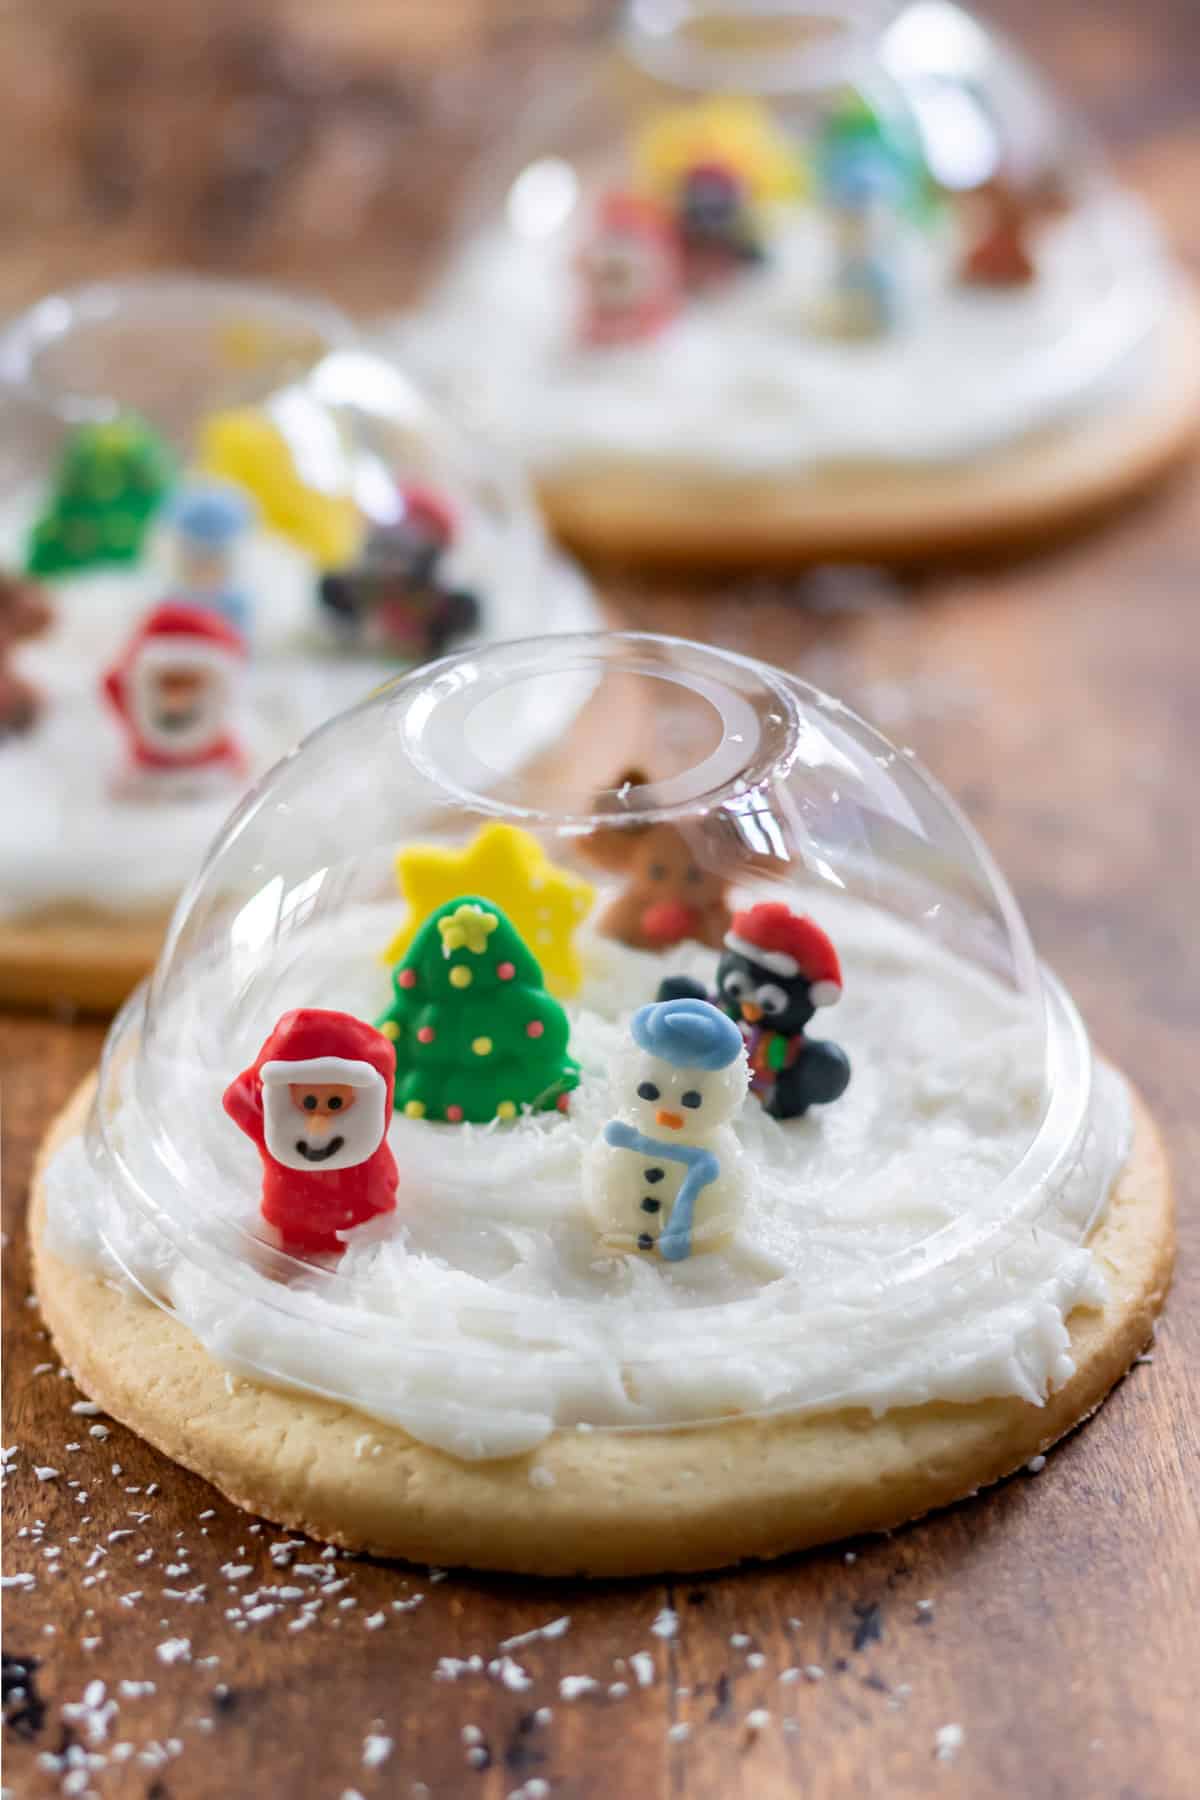
Create a whimsical winter wonderland with these easy Snow Globe Cookies! They have a sugar cookie base, frosting 'snow' and are filled with edible Christmas scenes. Get all the tips and tricks to whip up this adorable treat.
There's something enchanting about snow globes-they capture the magic of winter in a tiny, contained world.
Now, imagine that magic translated into a delicious treat! That's exactly what these Snow Globe Cookies bring to your holiday table.
The base is a perfect sugar cookie-crisp on the edges, soft in the middle, and infused with the warmth of vanilla.
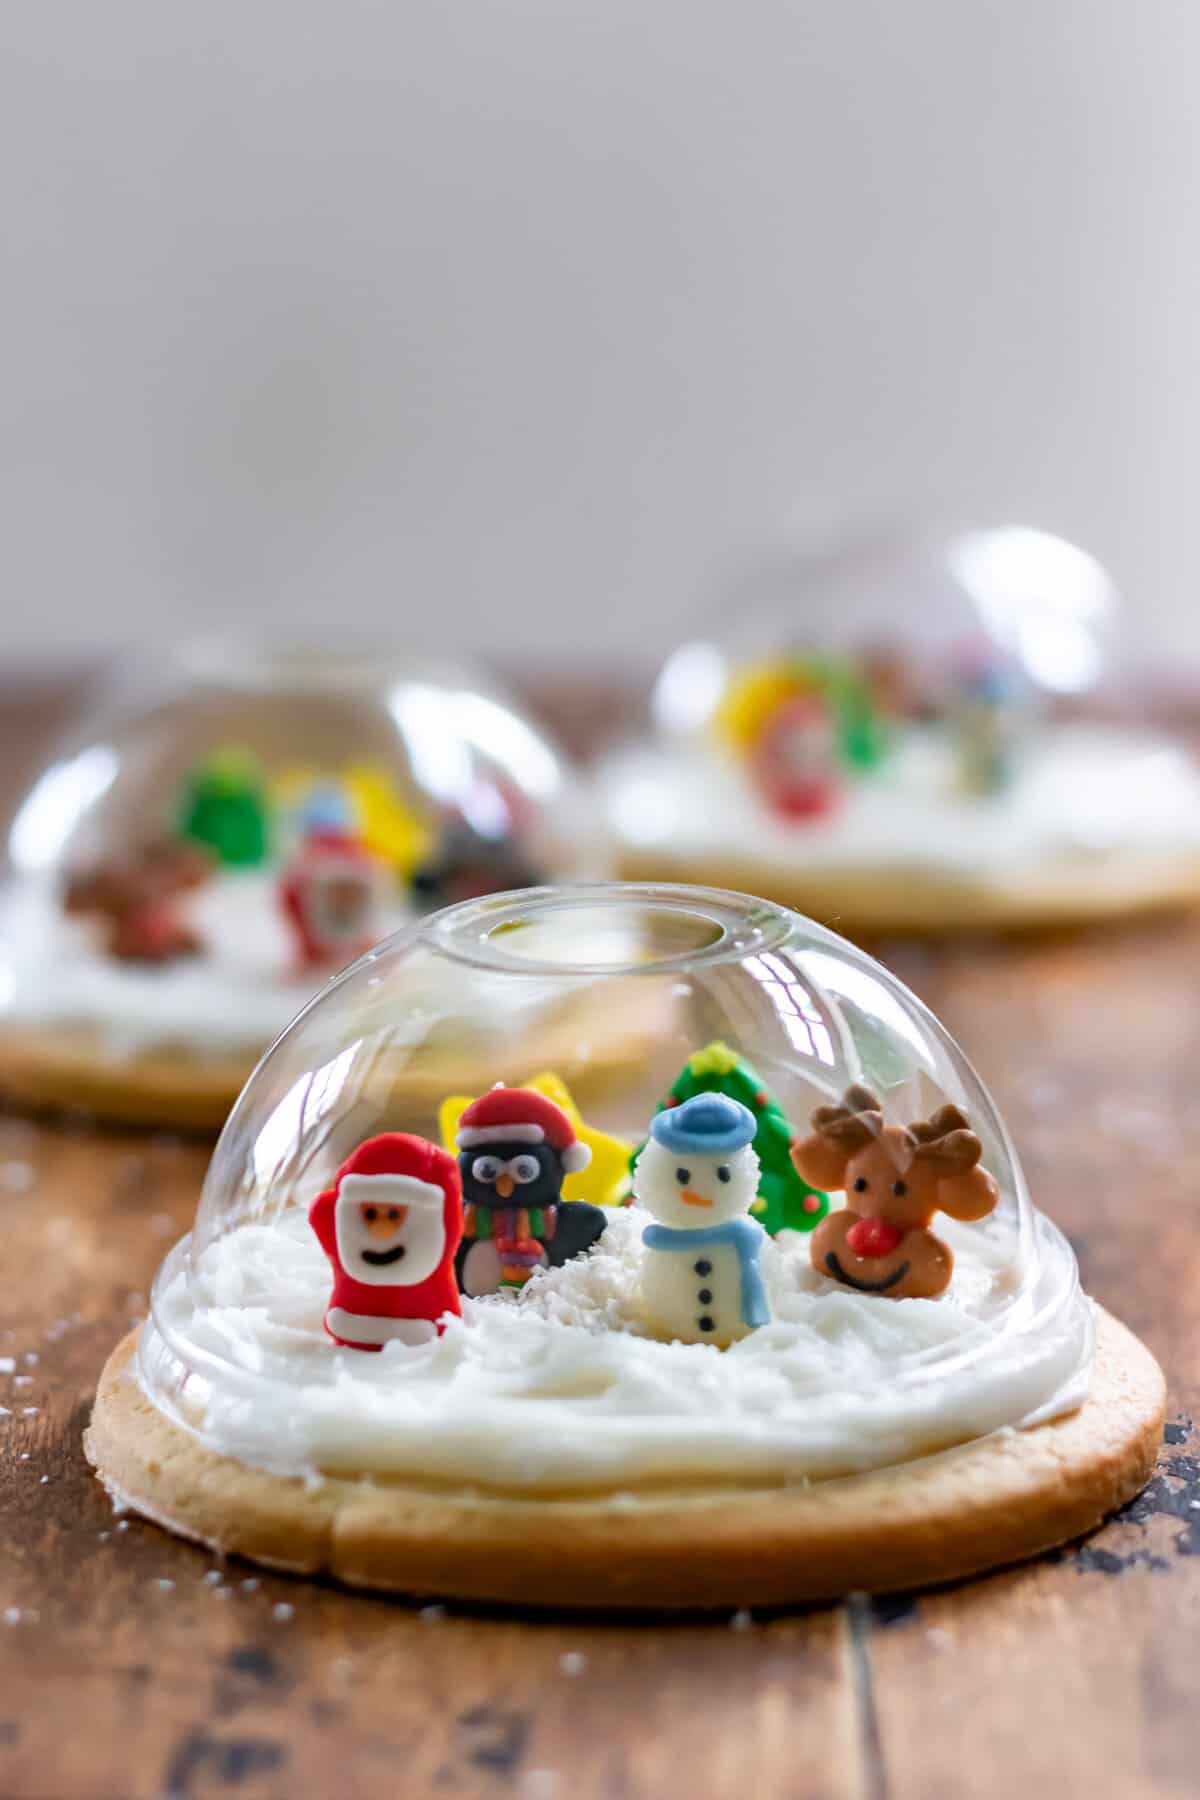
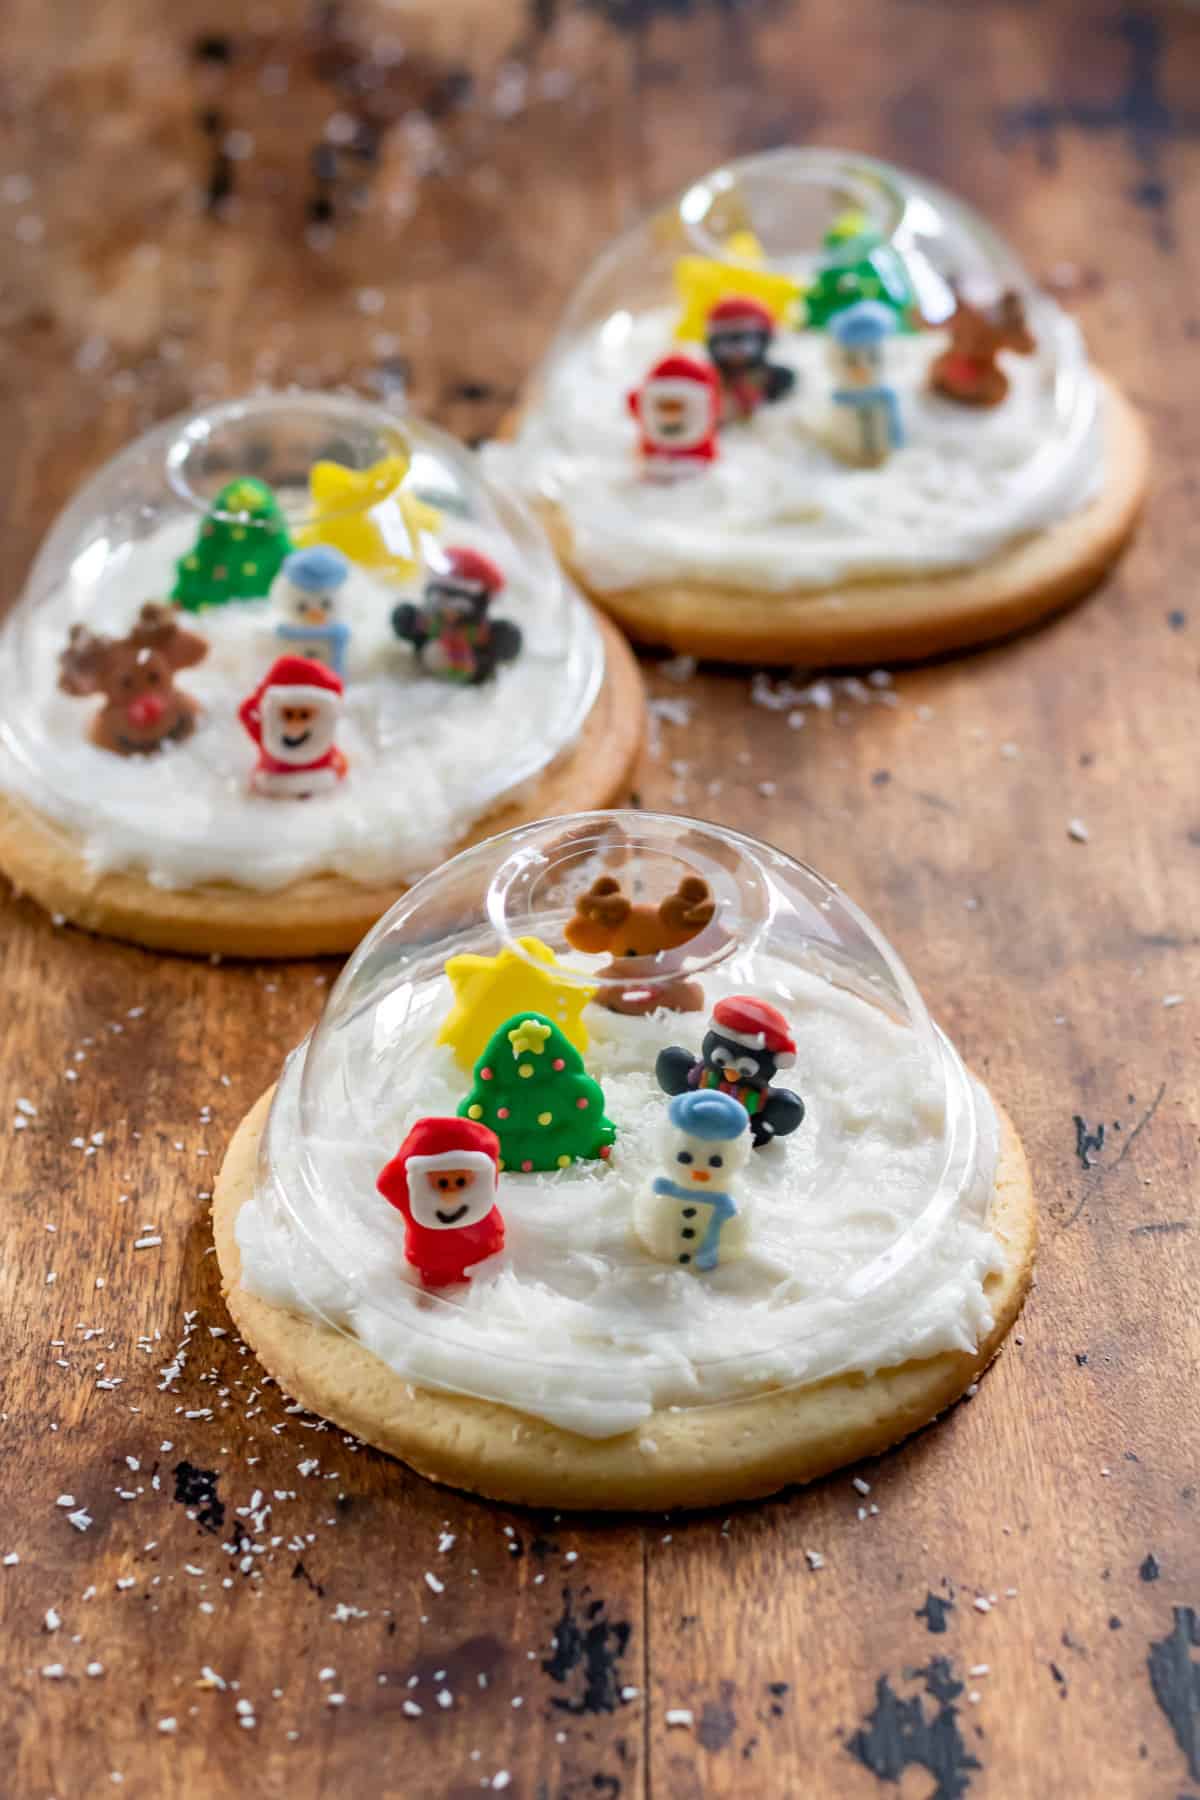
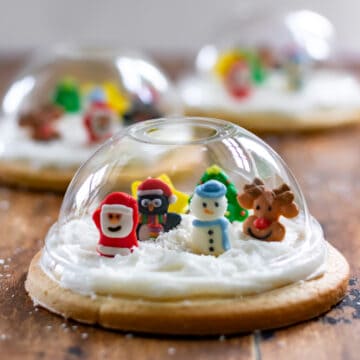
The real charm, however, lies in the snow-like frosting that blankets each cookie. It not only tastes great but creates a snowy landscape for the miniature Christmas characters to frolic in.
You have a few options for the dome - you can buy clear plastic domes from Amazon, or, you can do what I did. I asked nicely at my local corner store and they let me have some small slushy lids in exchange for a donation to charity.
You're also going to need some edible Christmas character decorations. You can find them in most grocery stores if you don't want to make your own with sugarcraft!
I actually had the idea for these cookies way back in the summer! I was at the corner store with my daughter and let her get a slushy. When I saw the dome, I instantly thought of Snow Globe Cookies. I had to wait a few months, but that gave me plenty of time to perfect the recipe. I'm so excited that I can now share the recipe with you all.
If you're looking for more Christmas cookie recipes for the holidays, then be sure to try German Bethmännchen, Christmas Tree Cookies, or Chocolate Peppermint Cookies. Or, check out this epic list of Milk and Cookies For Santa!
Jump to:
Why You'll Love This Recipe
- Edible Winter Wonderland: These cookies are a festive feast for the eyes, resembling tiny snow globes with edible scenes inside.
- Perfect for Celebrations: Whether it's a family gathering, a holiday party, or a cookie exchange, Snow Globe Cookies add a touch of magic to any celebration.
- Kid-Friendly Fun: Get the little ones involved in decorating their own edible snow globes, making it a delightful activity for the whole family.
- Versatile Decorations: Customize the Christmas characters inside each globe to suit different occasions or themes.
- Homemade Happiness: Nothing says love like homemade cookies. Share these edible snow globes with friends and family for a heartfelt holiday gesture.
Ingredients
For the sugar cookies:
- All-purpose flour / Plain flour: The base of the cookie, providing structure and texture.
- Baking powder: Adds a slight lift for that perfect cookie thickness.
- Salt: Balances the sweetness and enhances the flavor.
- Unsalted butter: The key to a rich and buttery cookie.
- Granulated white sugar: Sweetens the dough for a classic sugar cookie taste.
- Eggs: Bind the ingredients together and add moisture.
- Vanilla extract: Infuses the cookies with a warm and inviting flavor.
For the snow frosting:
- Unsalted Butter: Creates a smooth and creamy frosting base.
- Vanilla extract: Adds a subtle sweetness to the frosting.
- Powdered sugar: Forms the base of the sweet and snowy frosting.
- Milk: Adjusts the consistency of the frosting for easy spreading.
To decorate:
- Clear plastic domes: Transform your cookies into mini snow globes. You can buy slushy domes at Amazon.
- 3D edible Christmas character decorations: Choose your favorite festive figurines.
- Shredded coconut or edible glitter: Mimic the look of snow inside the globes.
Ingredient Tips:
- Butter: If you're out of unsalted butter, you can use salted butter and reduce the added salt in the cookie recipe.
- Vanilla Extract: For a twist, try using almond or peppermint extract for a different flavor profile.
- Milk: Any type of milk works in the frosting, so feel free to use what you have on hand.
See the recipe card for quantities.
Instructions
Follow this step-by-step photo tutorial, then scroll down to the recipe card for the full ingredients list and method.
For the sugar cookie dough:
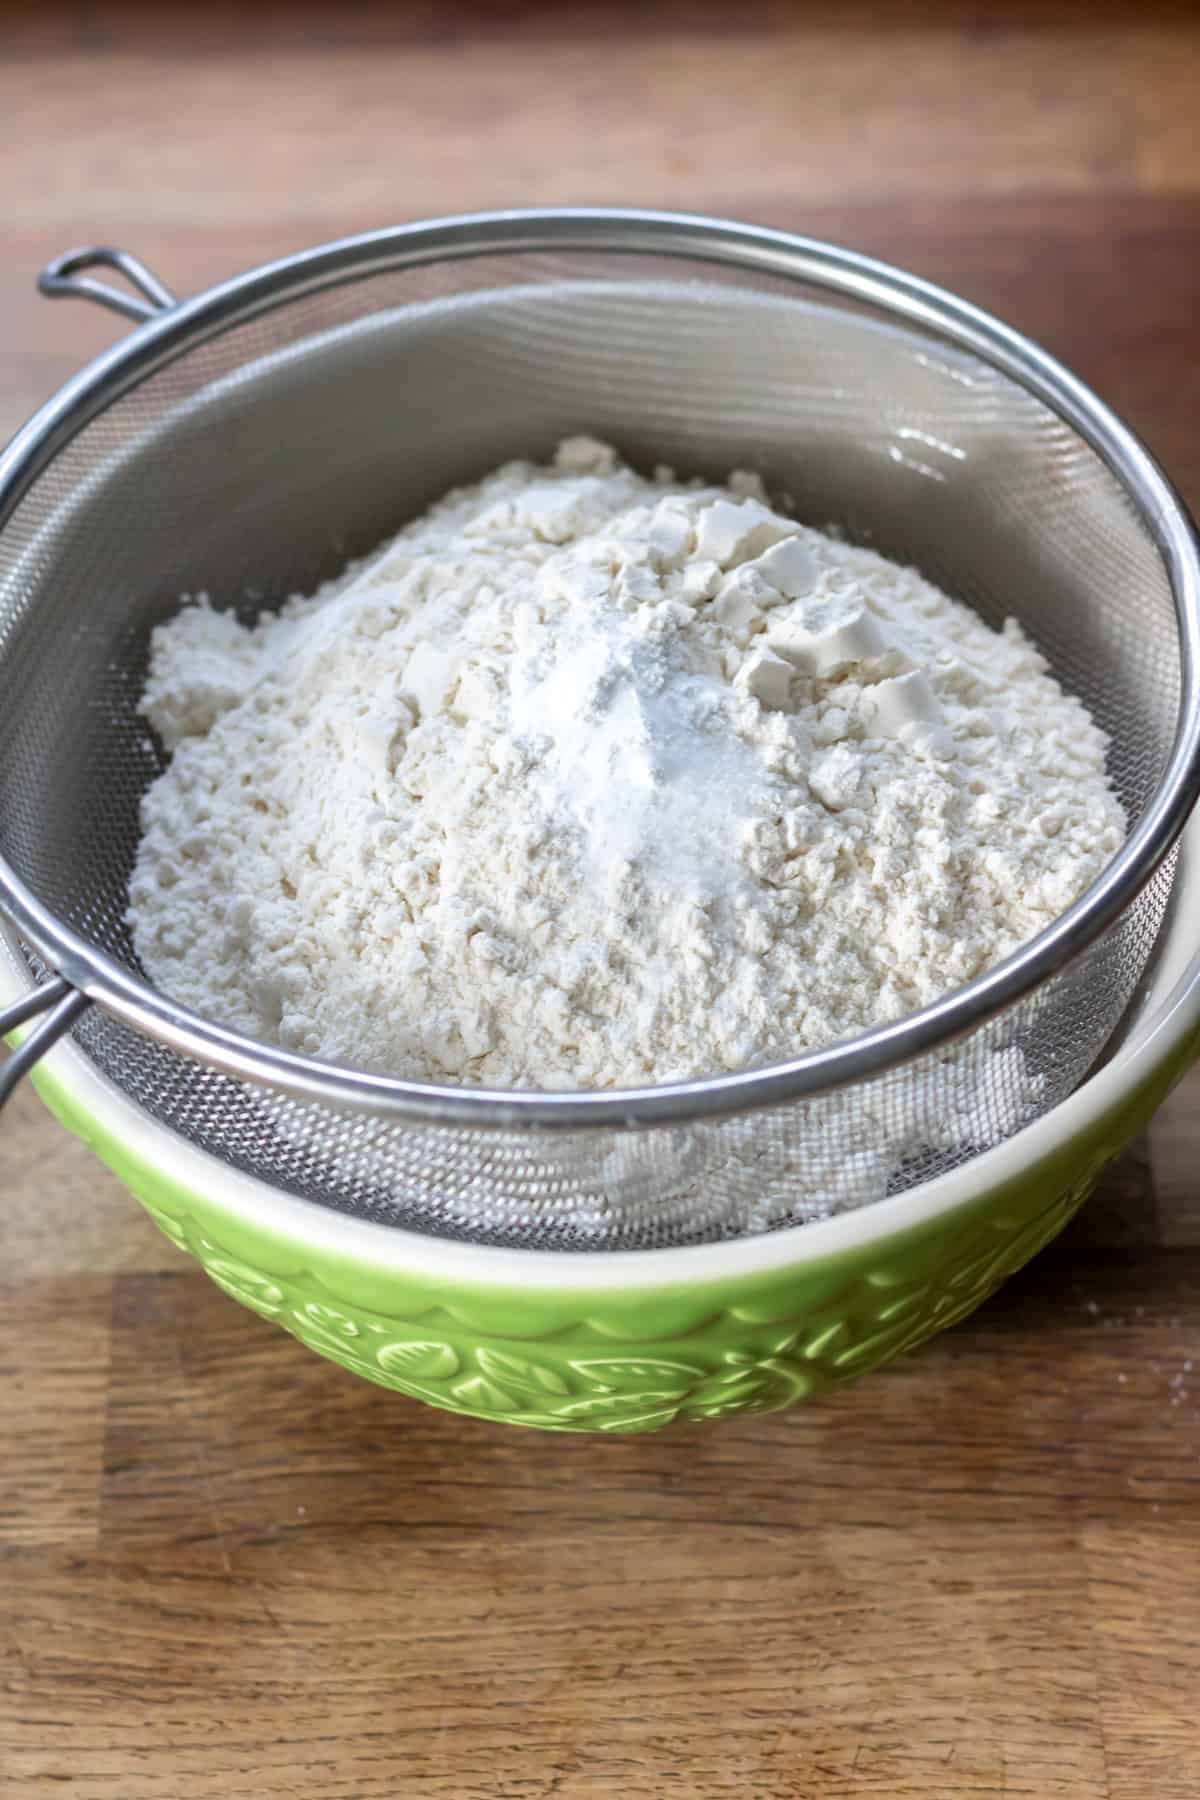
Sift the flour, baking powder and salt into a medium mixing bowl. Set aside.
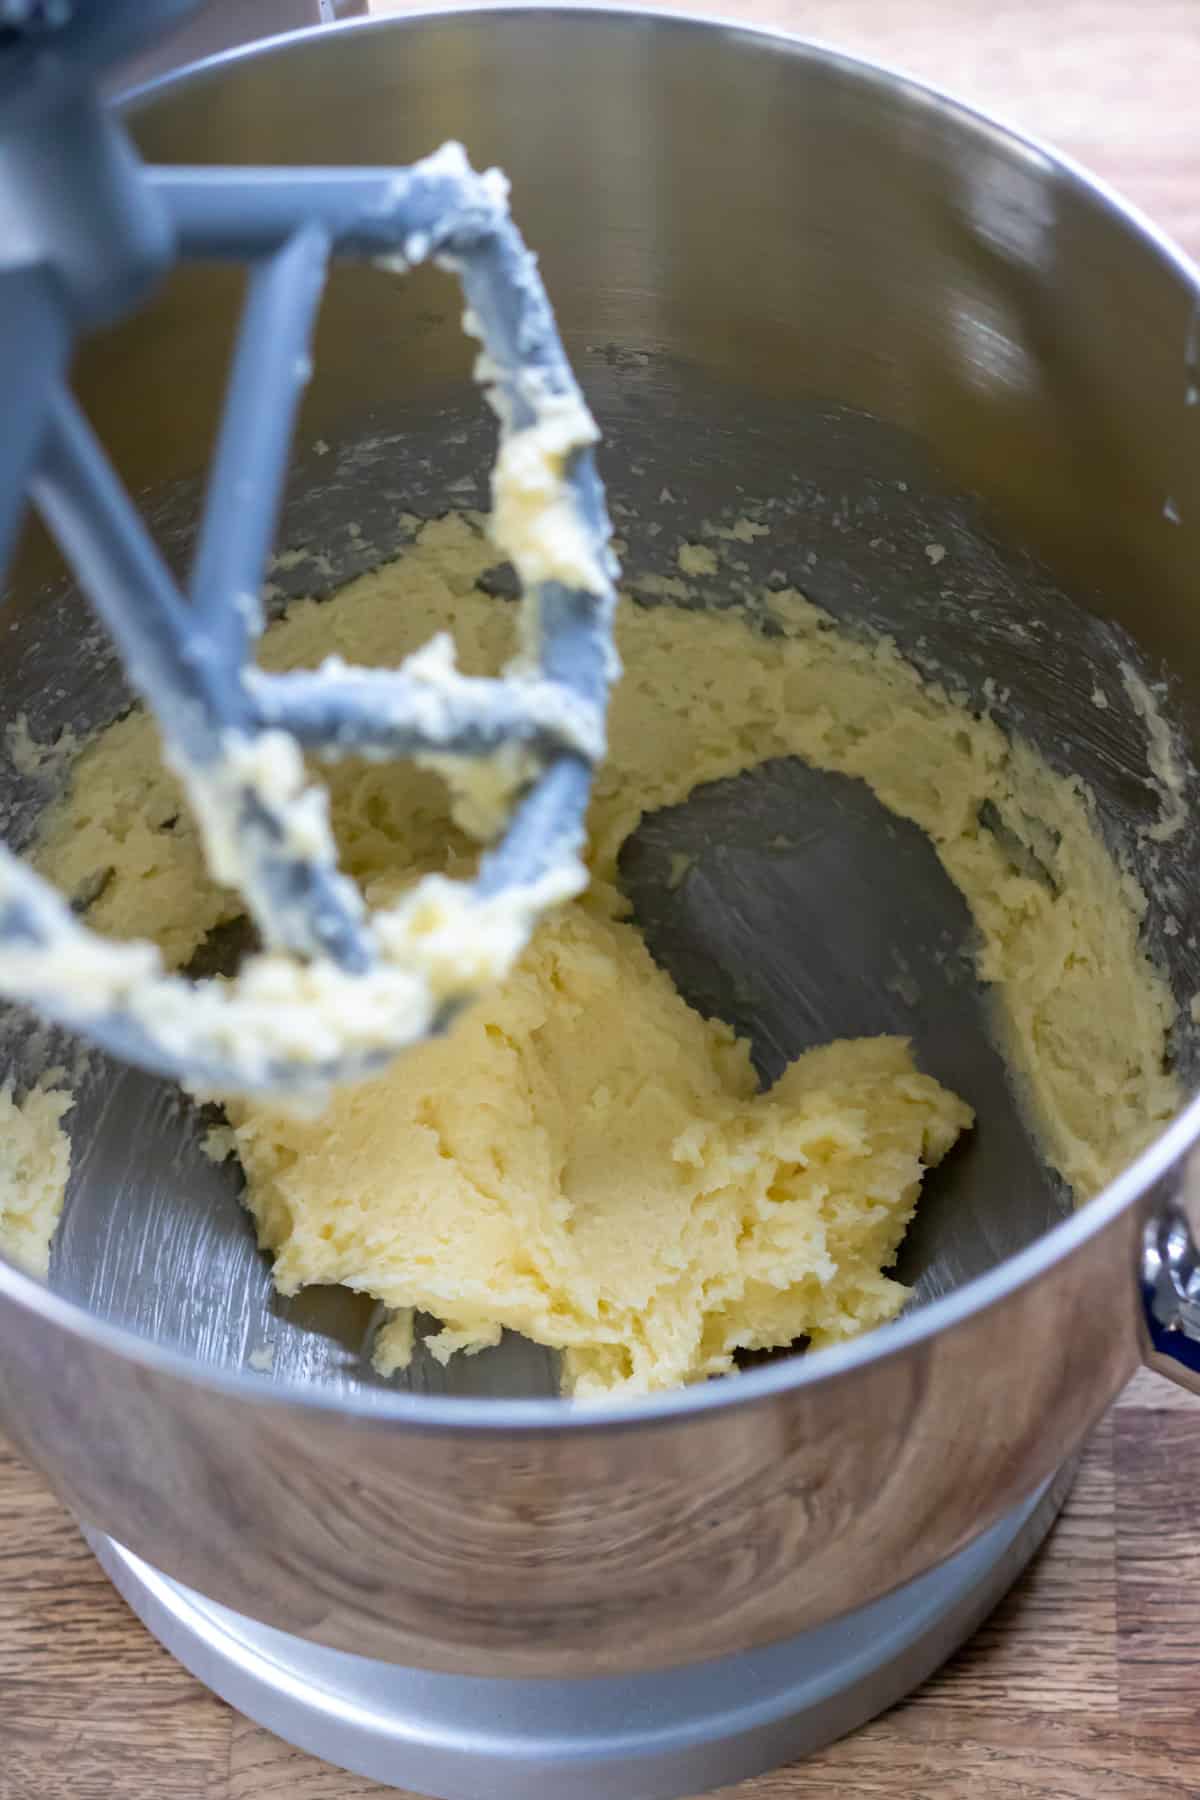
In a large mixing bowl (or the bowl of a stand mixer with the paddle attachment), beat the butter and sugar together with an electric mixer for about 2 minutes or until light and fluffy.
Beat in the eggs, one at a time, scraping down the sides of the bowl as needed. Beat in the vanilla.
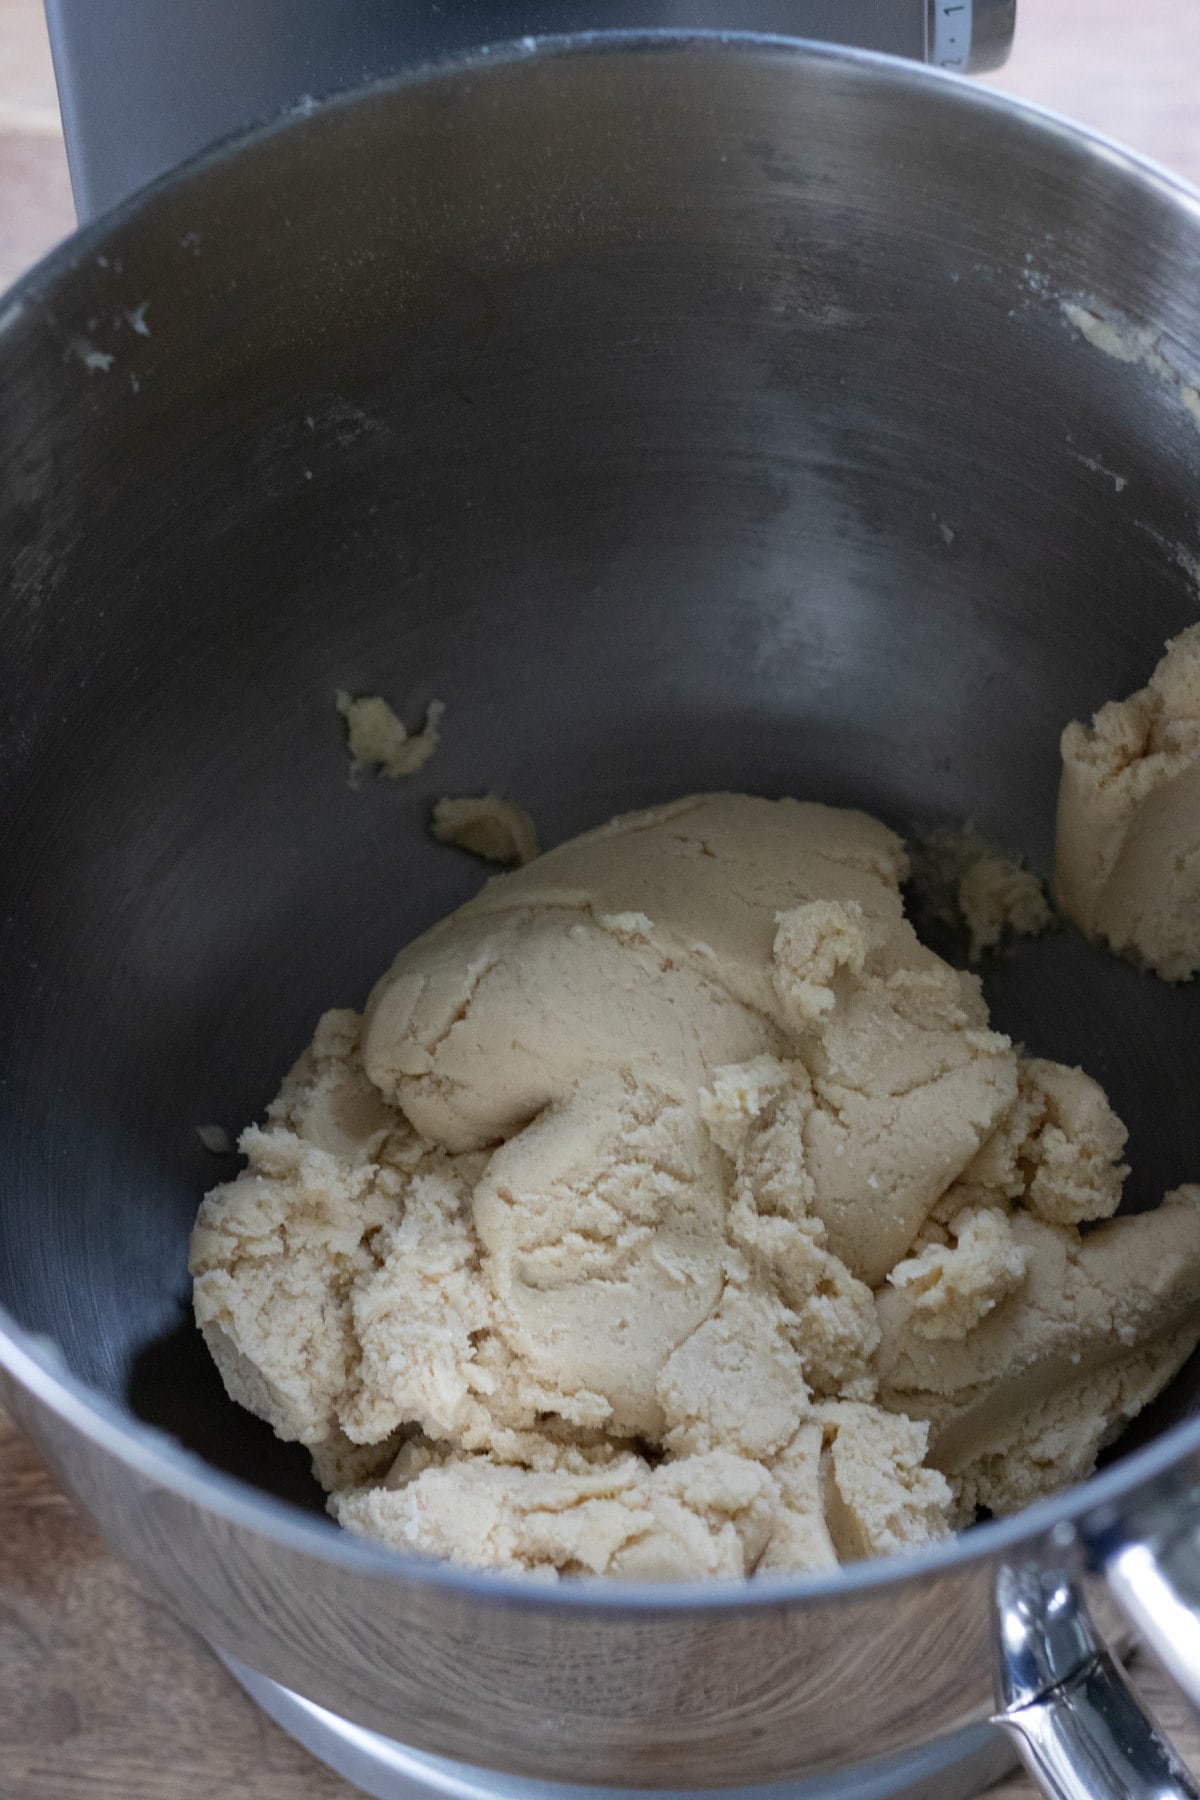
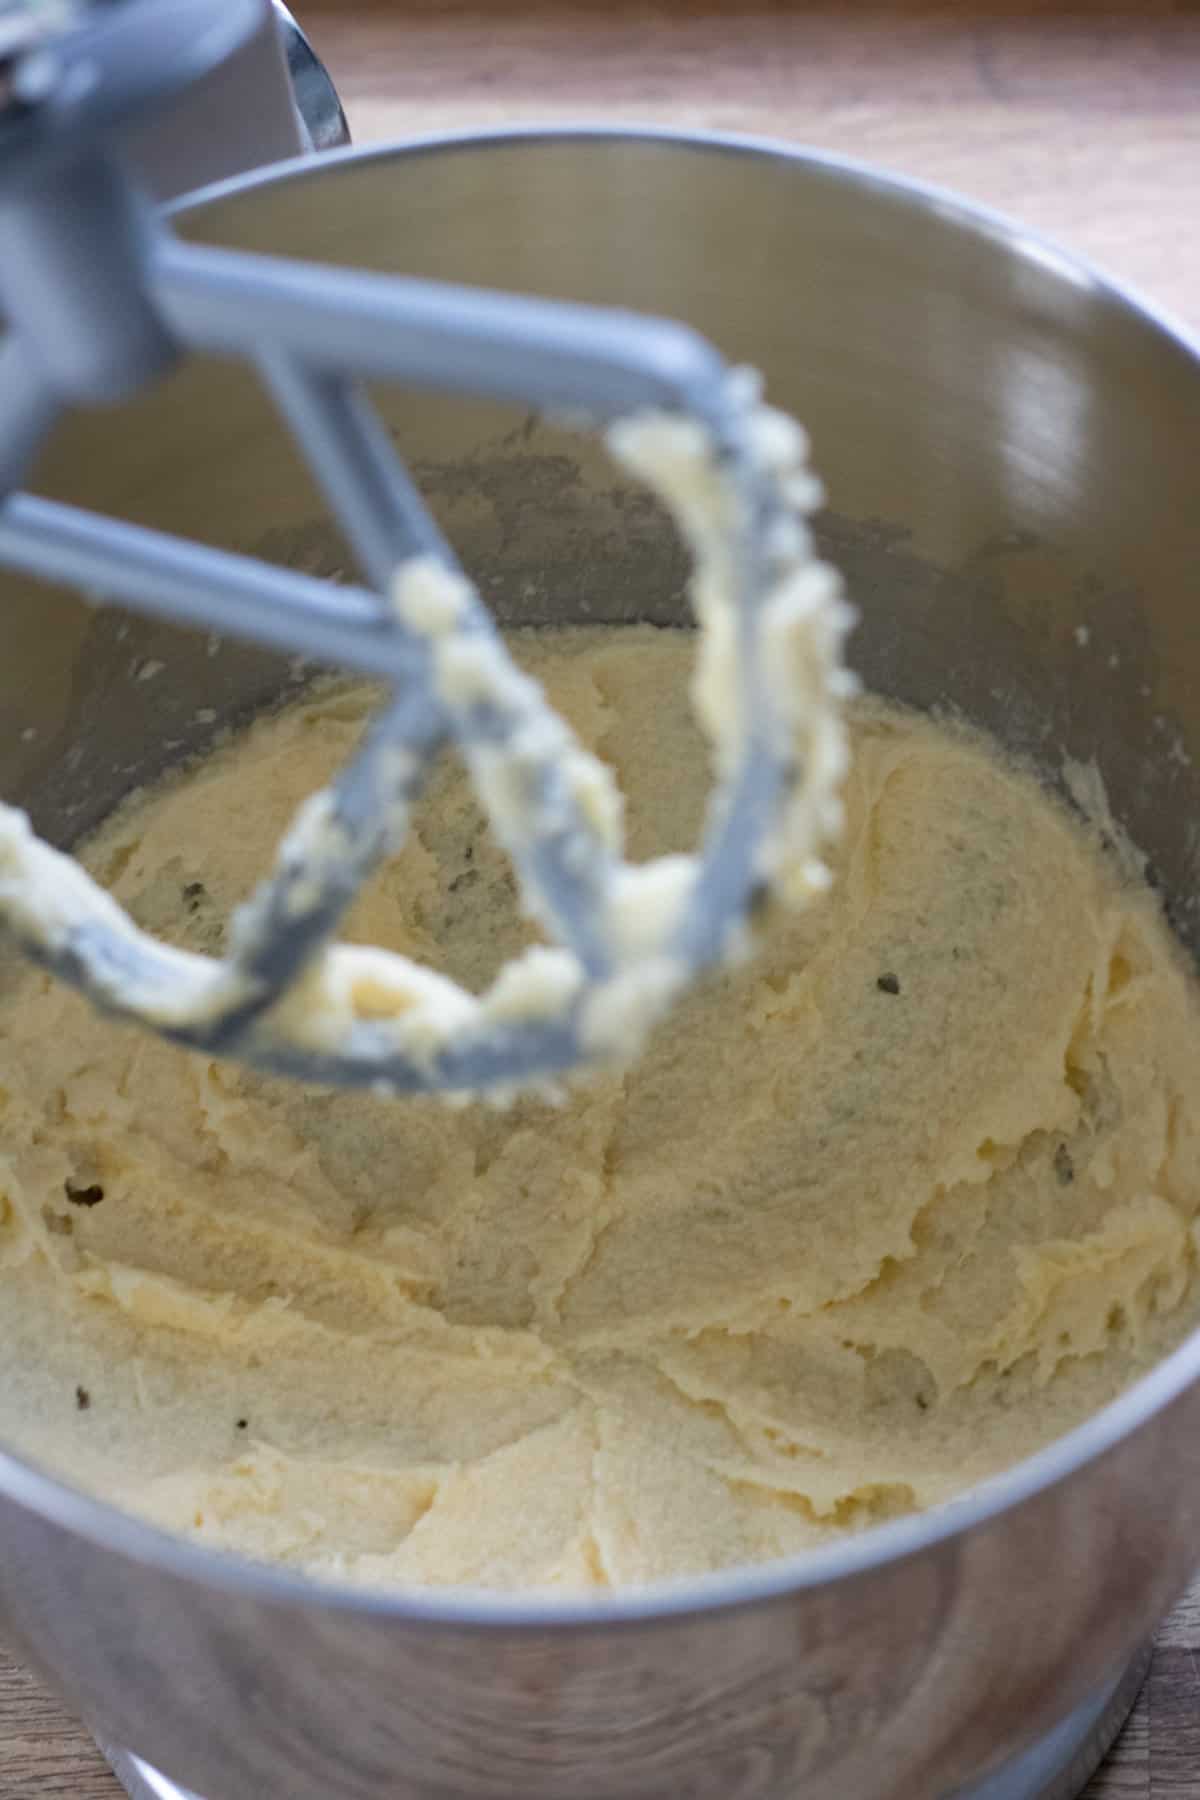
Gradually add in the flour mixture, a little at a time, until it's all mixed in.
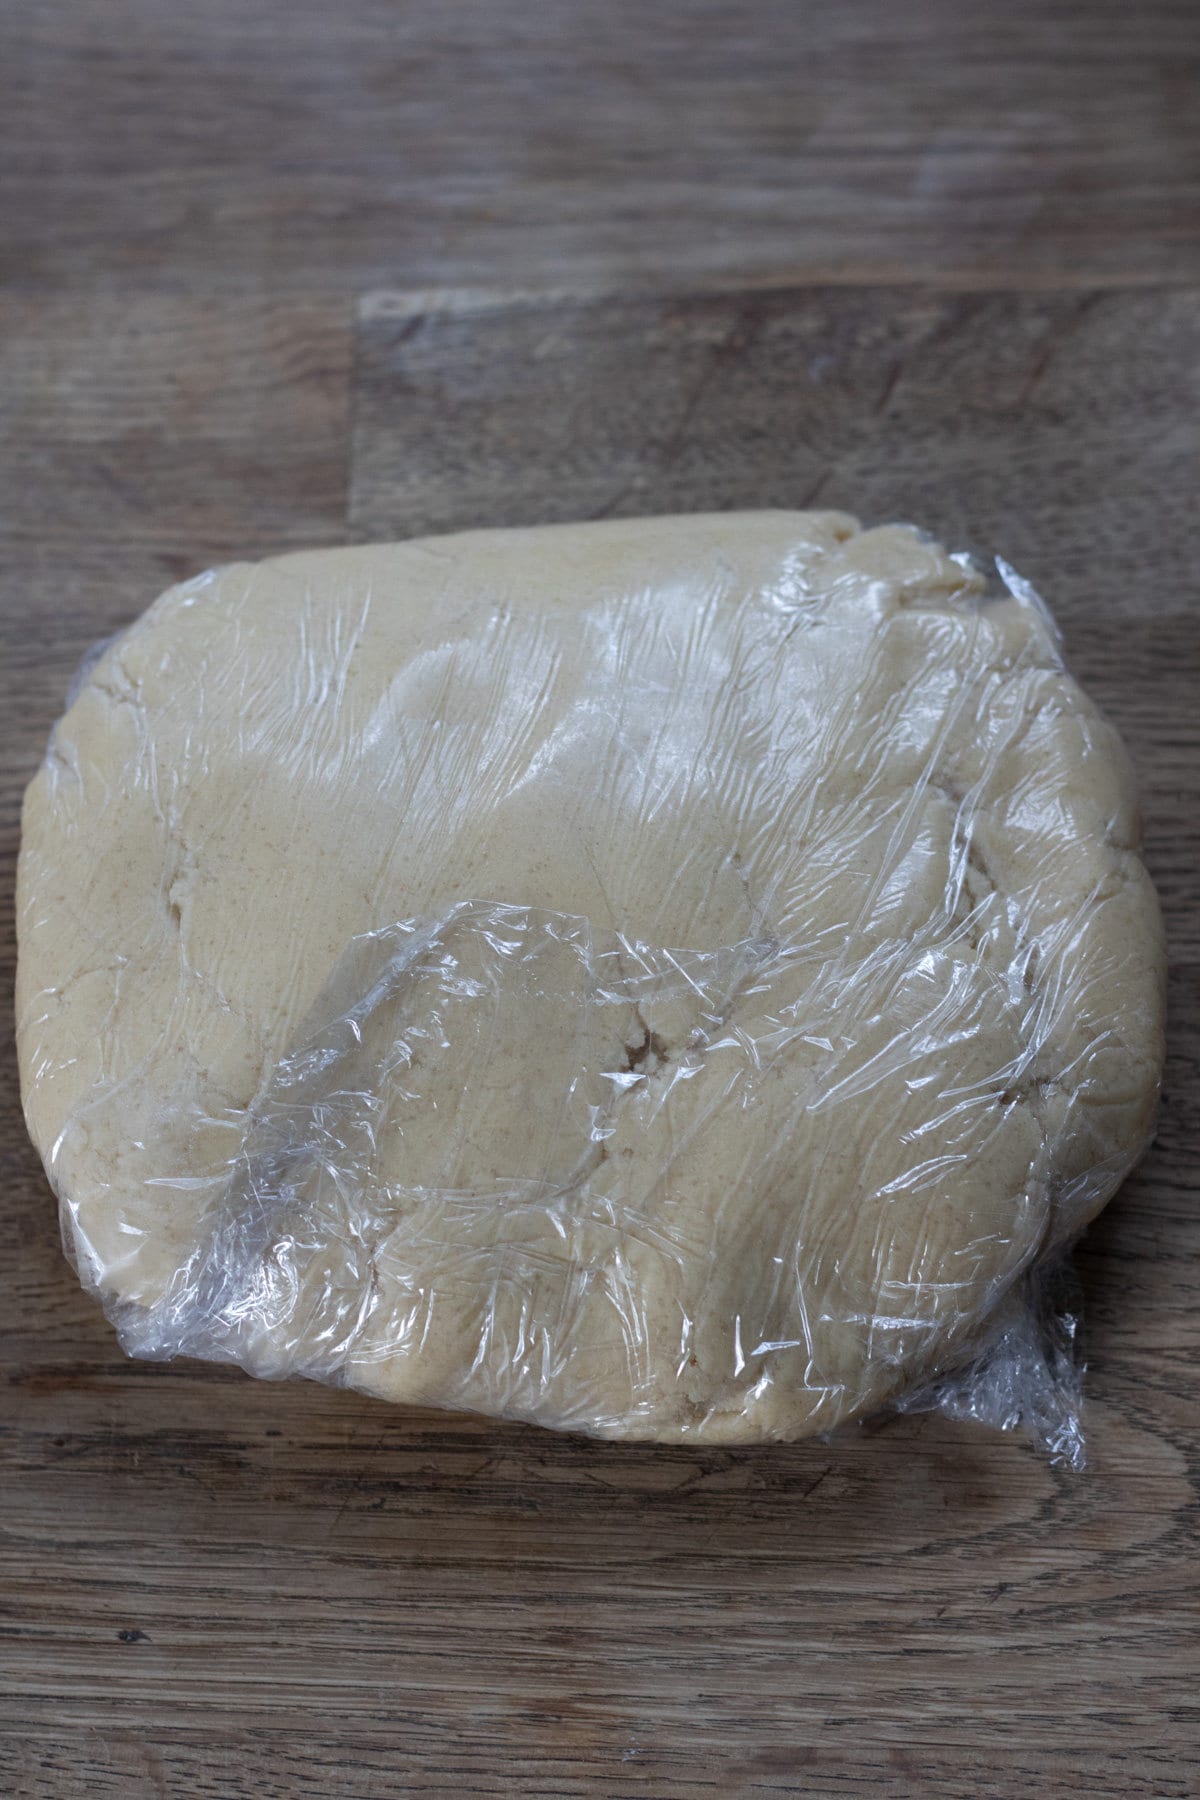
Divide the dough in half, shape into two flat rounds, and wrap them in plastic wrap. Chill in the refrigerator for 2 hours or overnight. (TIP: If you are chilling for longer than 2 hours, the dough will need to sit at room temperature for 30 minutes to soften slightly).
For the frosting:
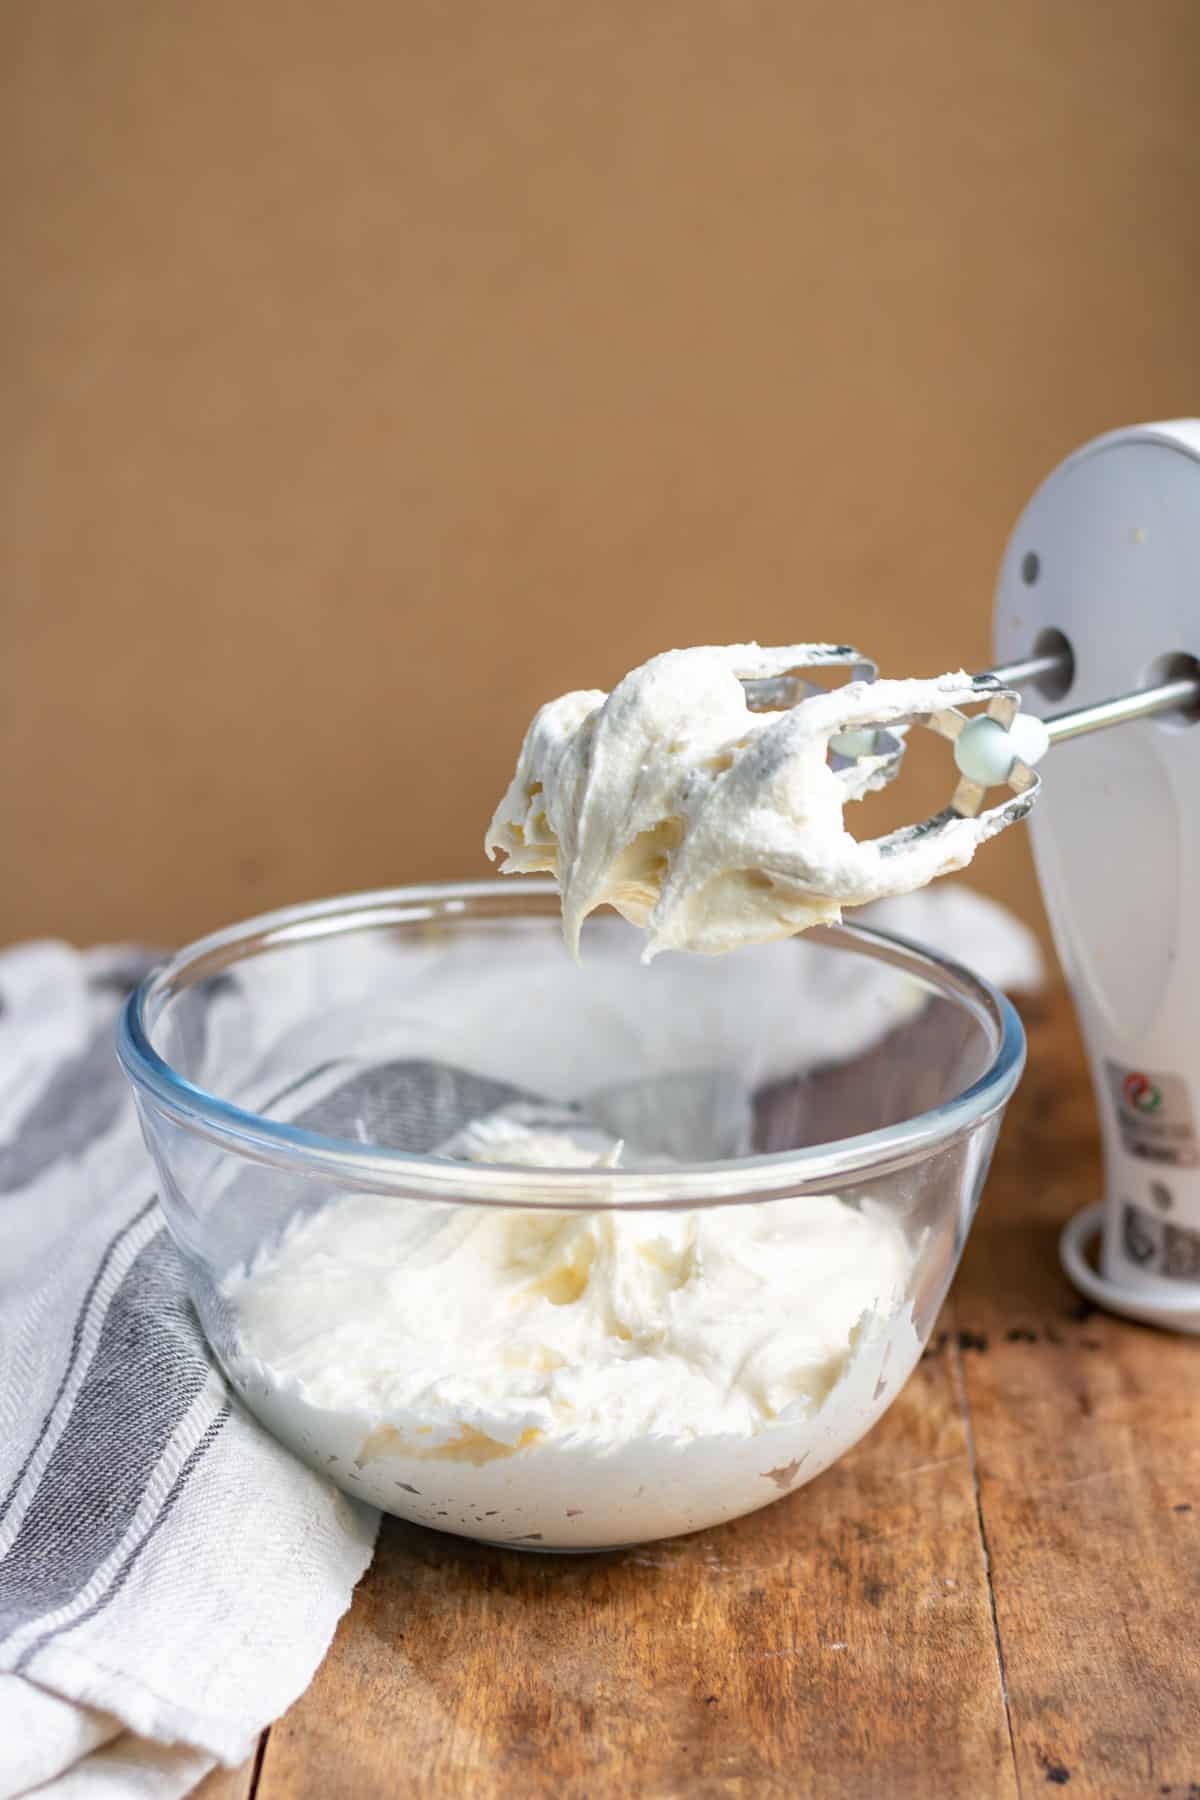
In a large bowl, beat the butter with an electric mixer until smooth, then beat in the vanilla. Sift in the icing sugar and add the milk, then beat until thick and smooth. If necessary, add a little milk or icing sugar to get the right consistency. Refrigerate until ready to use.
To bake:
Preheat the oven to 375°F / 190°C. Line cookie sheets with parchment paper or silicone baking mats.
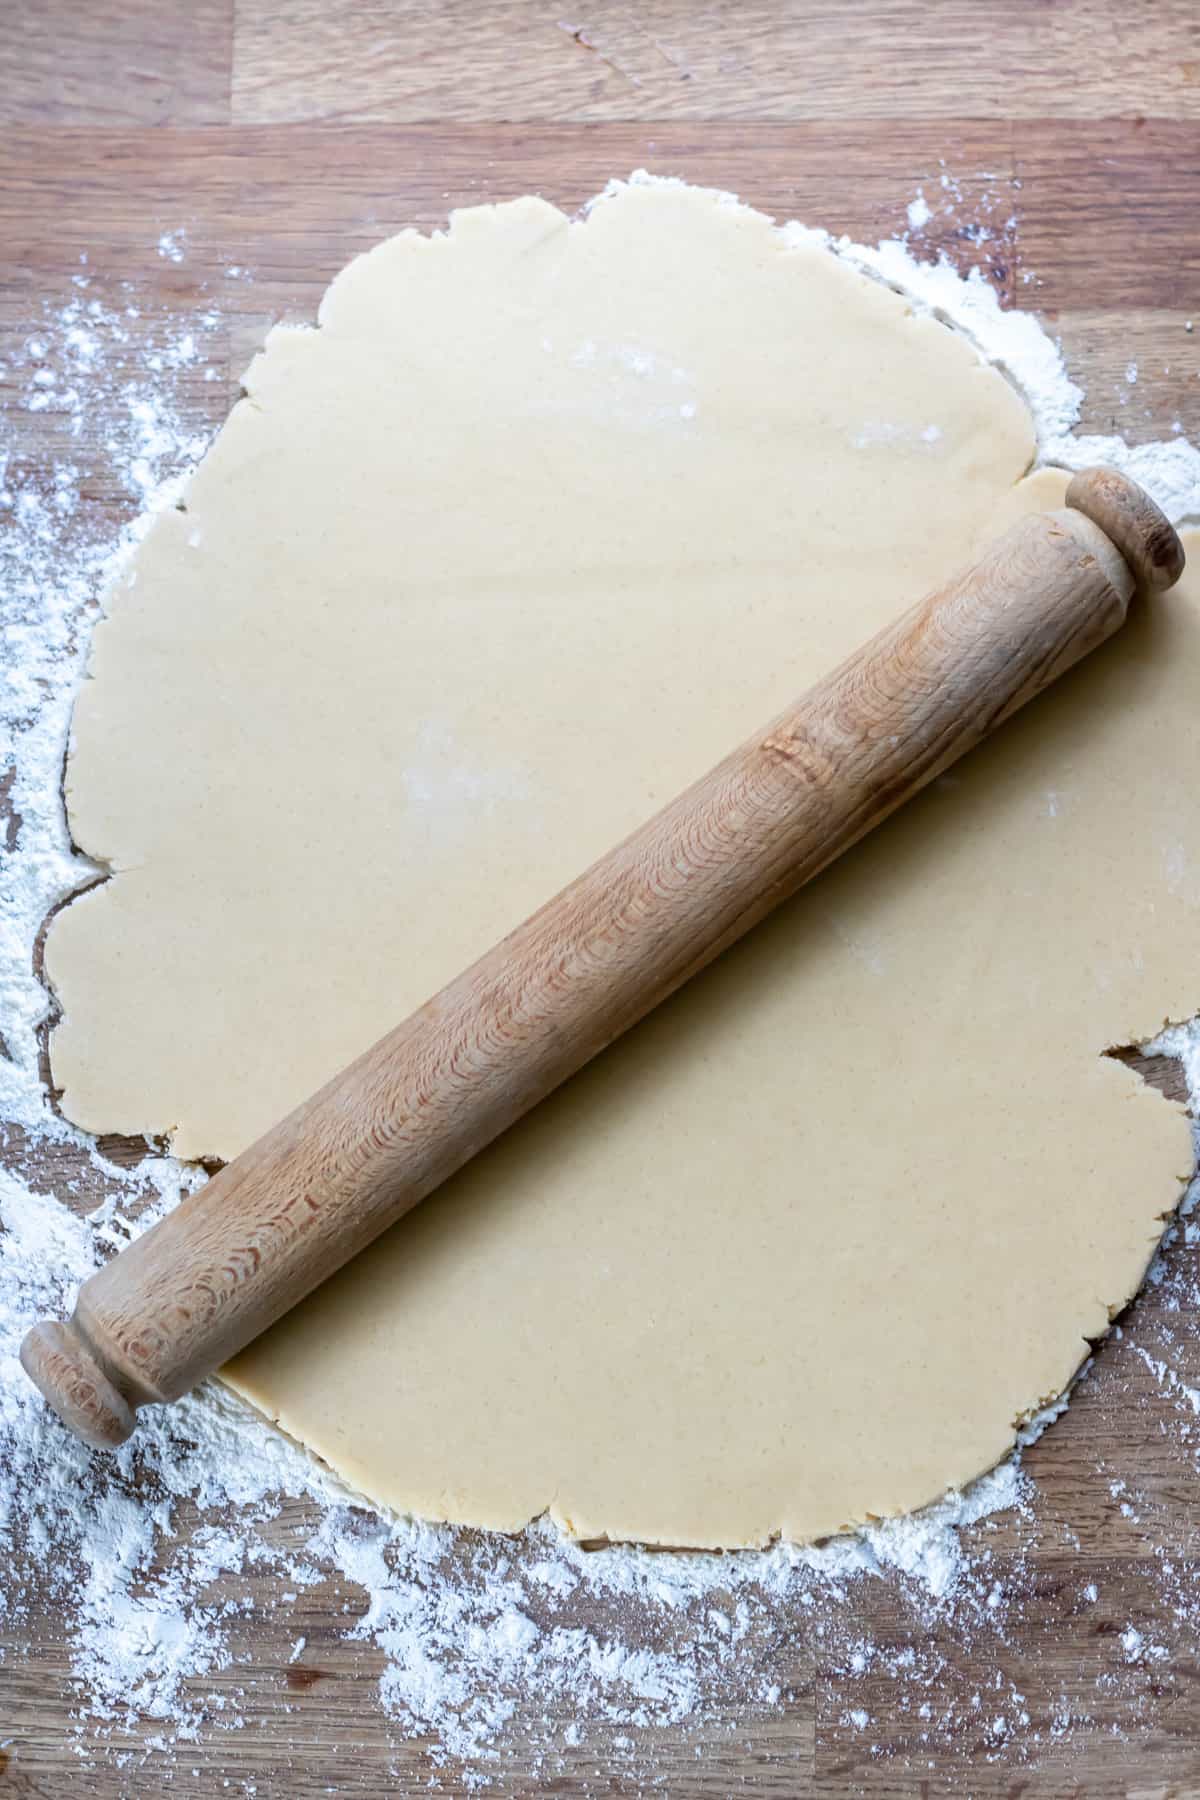
Lightly flour the work surface, then roll out the dough to about ¼-inch thick.
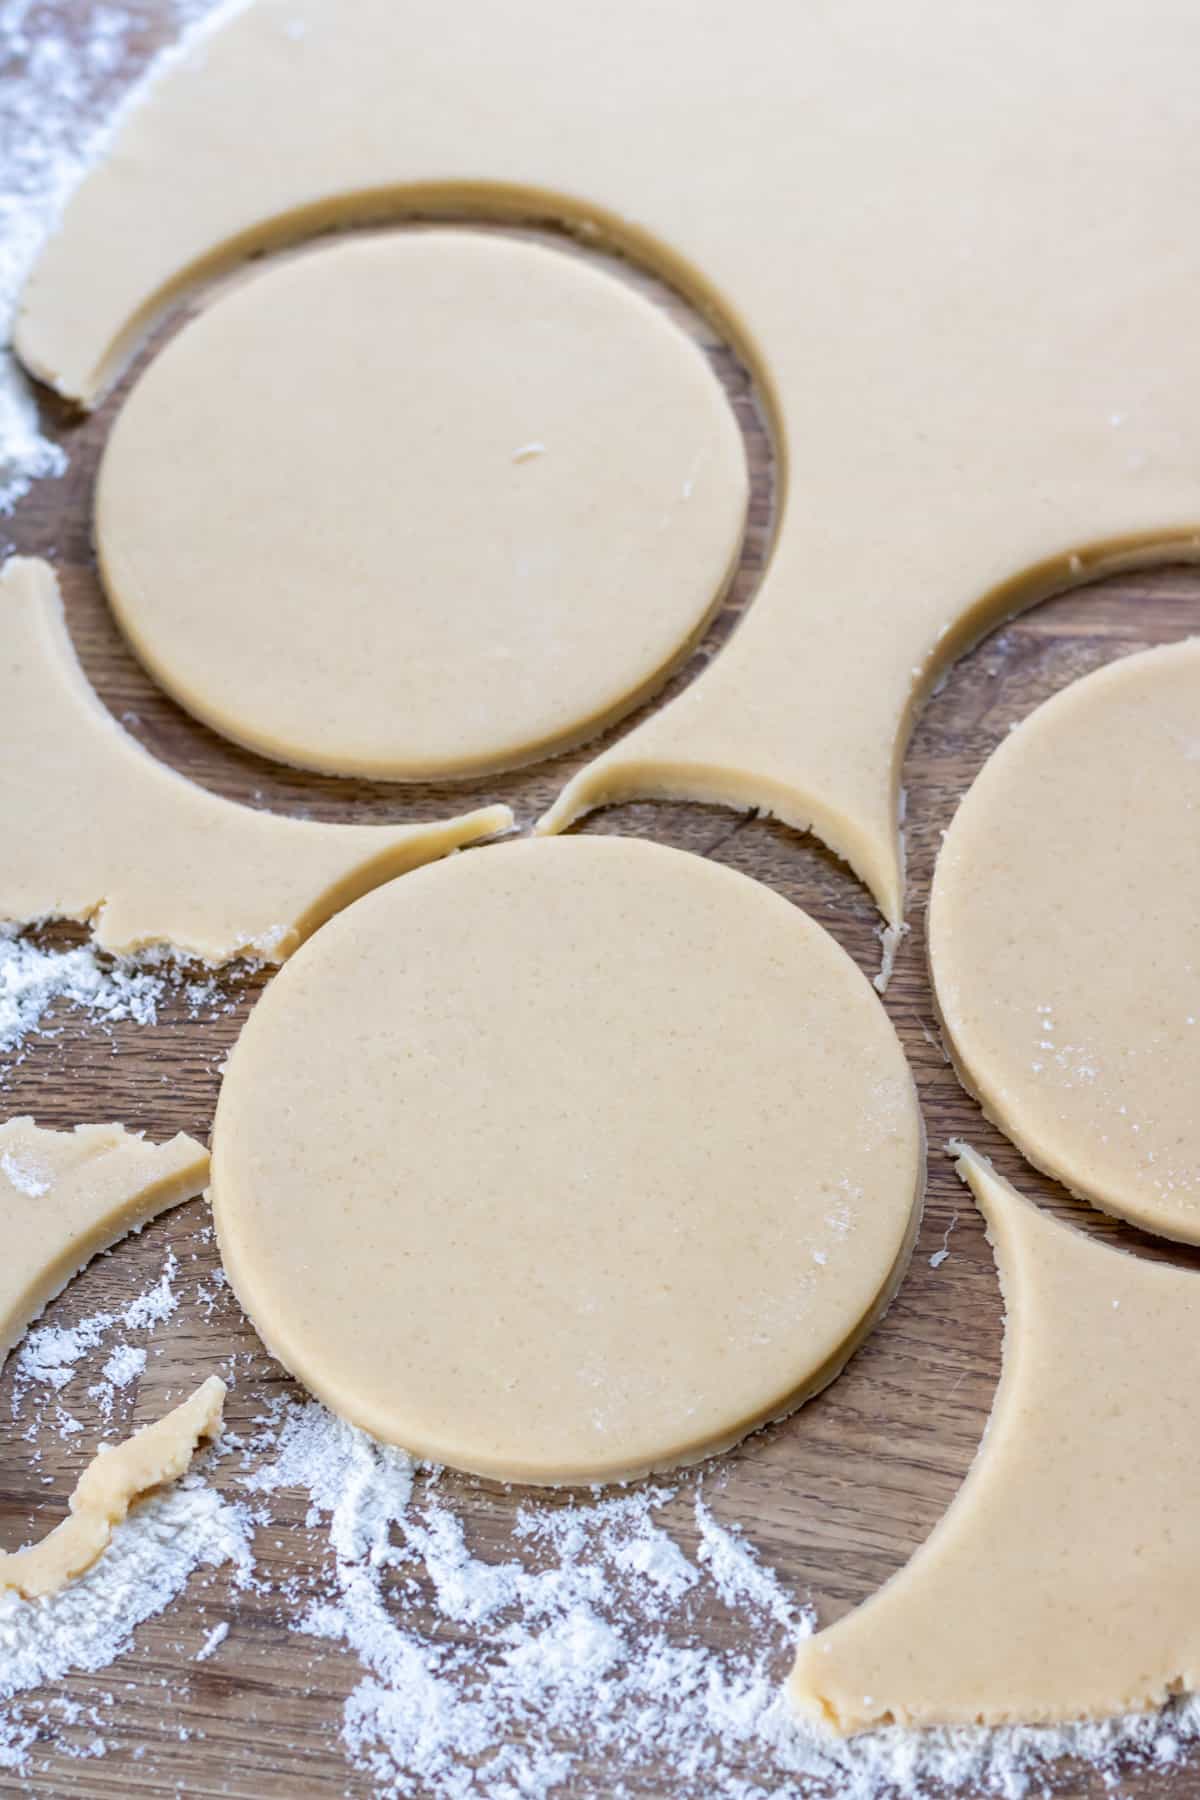
Cut out circles slightly larger than your plastic domes.
Re-roll as needed for more sugar cookies.
Place the circles of dough onto the prepared cookie sheets, at least 1 inch apart.

Bake for 10 minutes or until the edges start to turn slightly golden.
Allow the cookies to cool for a few minutes on the cookie sheets then transfer to a wire rack and cool completely.
To decorate:
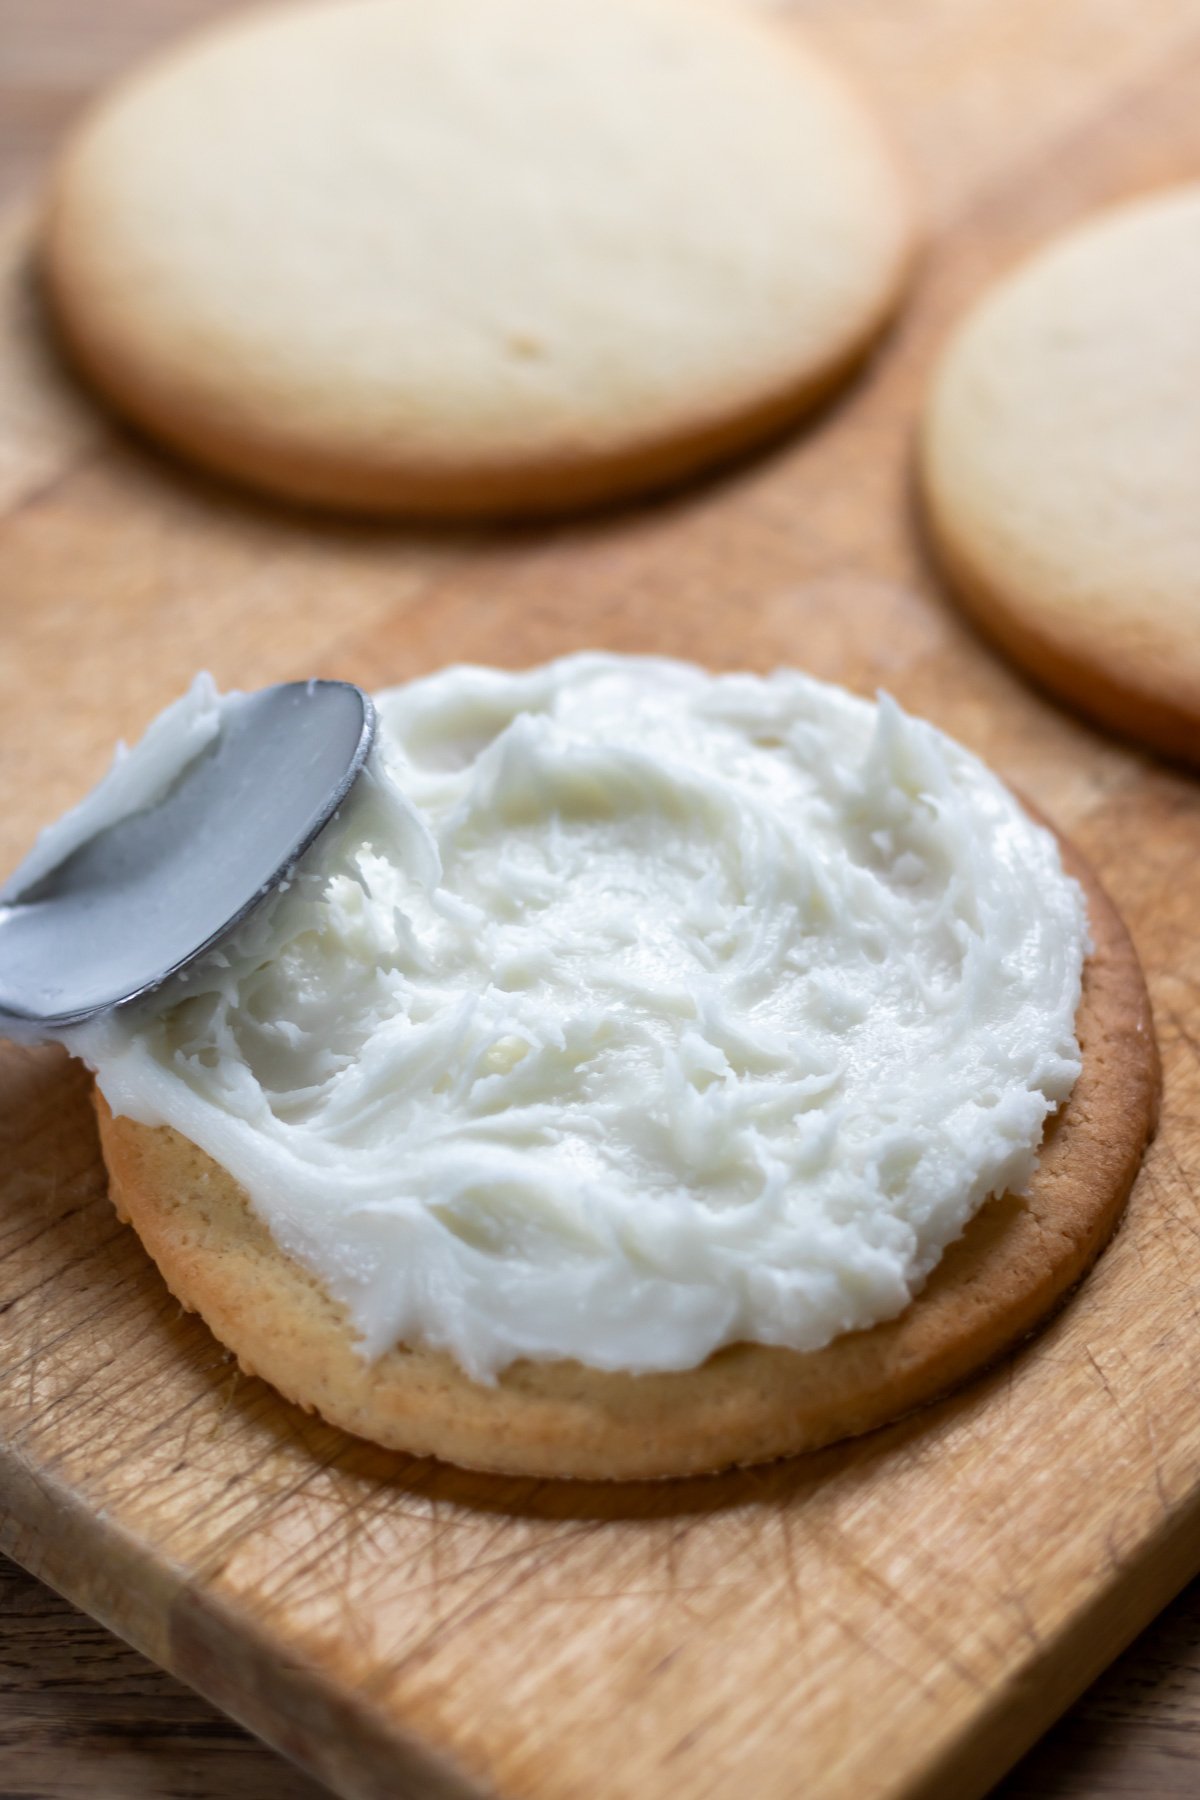
When the cookies are cooled, spread them with the frosting.
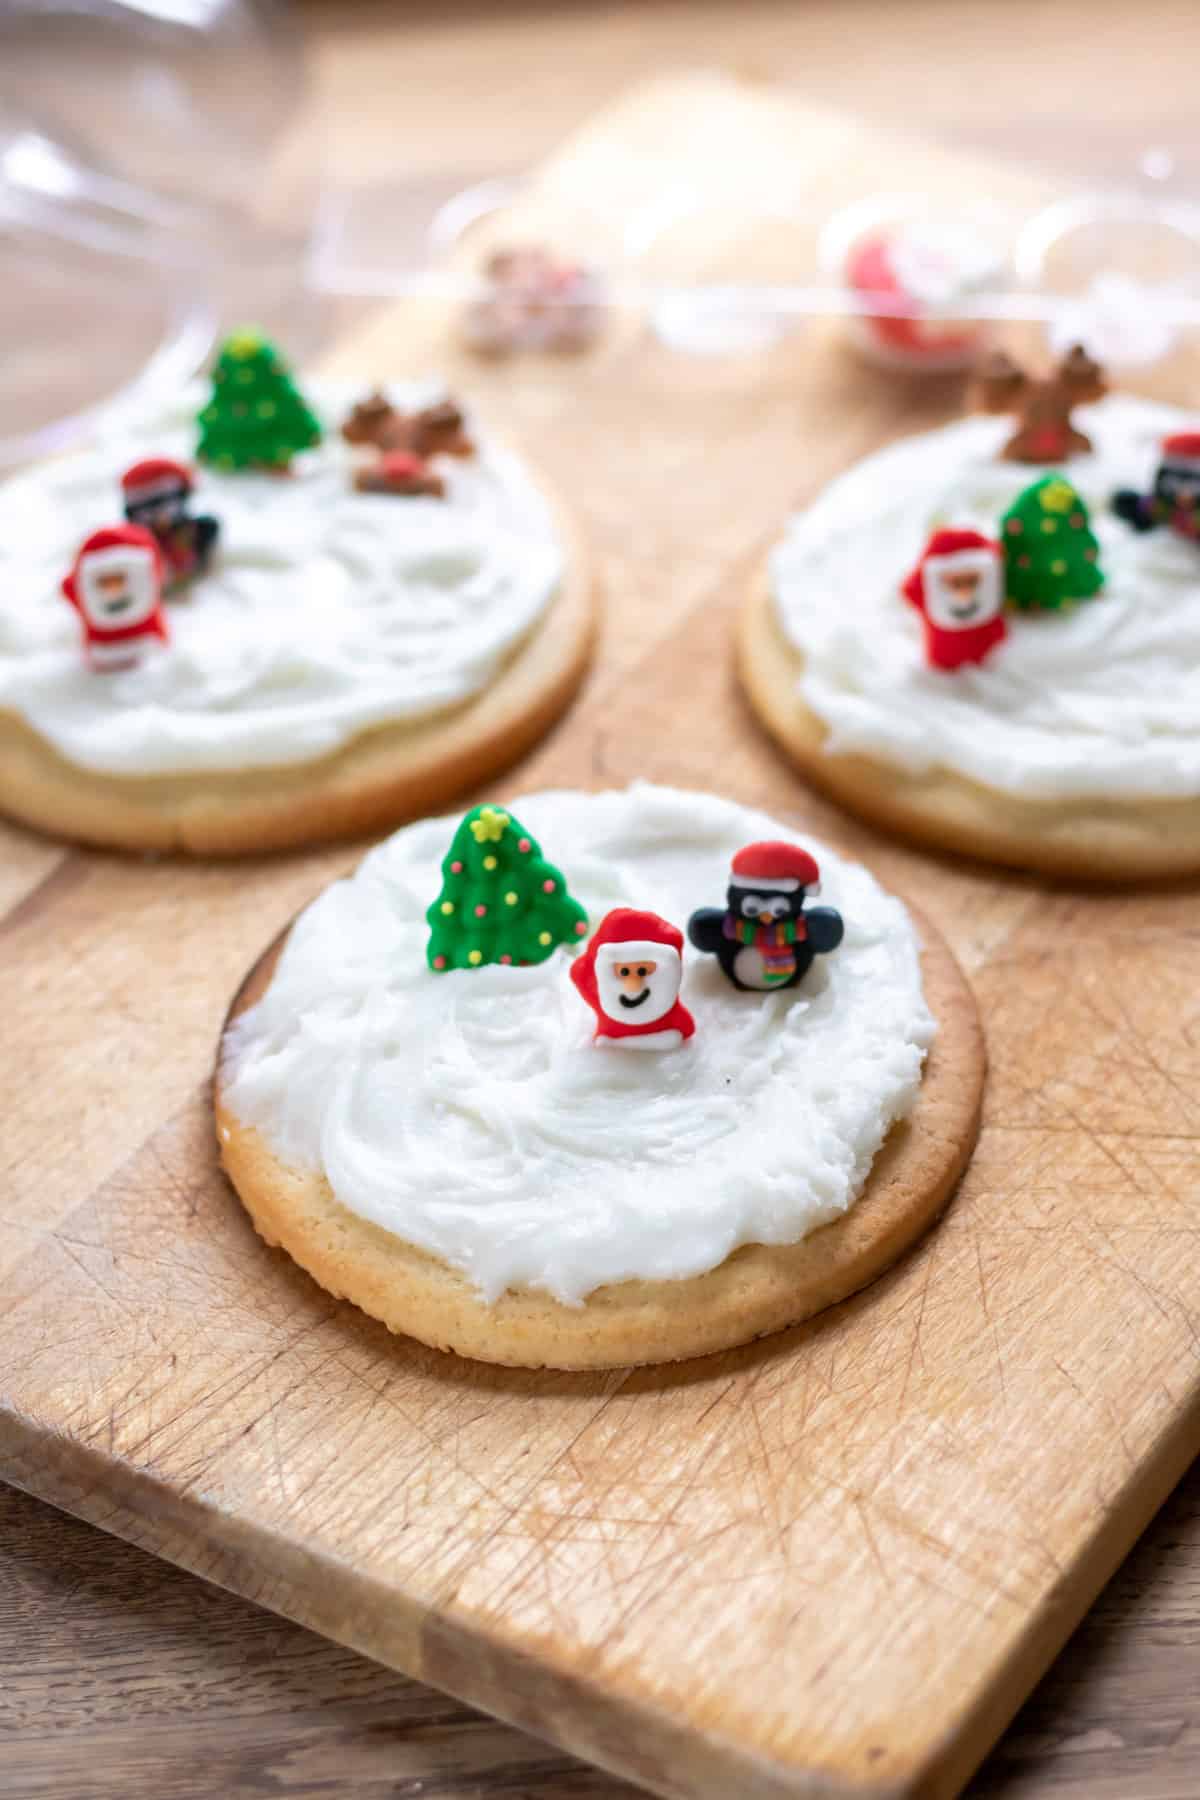
Add in the Christmas character decorations. Top with the clear plastic dome. I like to serve them with a dish of shredded coconut and let the kids sprinkle it into the domes like 'snow'.
Variations
- Chocolate Twist: Add cocoa powder to the cookie dough for a chocolatey version.
- Citrus Zest: Incorporate lemon or orange zest into the frosting for a citrusy kick.
- Holiday Spice: Mix in cinnamon, nutmeg, and ginger to the cookie dough for a spiced-up version. Or try Pumpkin Spice or Chai Spice.
Serving Suggestions
- Arrange the cookies on a festive platter for a charming presentation. Try adding other christmas cookies such as Icelandic Piparkokur or Christmas Cookies From Around The World.
- Serve with hot cocoa or mulled wine for the ultimate winter treat. Try Xocolatl - Aztec Hot Chocolate or Red Velvet Beet Hot Chocolate.
- Create a cookie decorating station for a fun and interactive dessert experience.
Storage
Store these Snow Globe Cookies in an airtight container at room temperature for up to a week. If you want to make them ahead, freeze the undecorated cookies and frost them closer to the serving date for optimal freshness.
Top tips
- Chill and Roll: Chilling the cookie dough is crucial for easy handling. Roll out the dough on a lightly floured surface to prevent sticking.
- Perfect Circles: Use a round cutter slightly larger than your plastic domes to ensure a snug fit.
- Room Temperature Frosting: Let the frosting sit at room temperature for a few minutes before spreading for smoother application.
- Get Creative: Experiment with different Christmas characters and decorations to make each cookie unique.
FAQ
Of course! Just be sure to roll it a bit thickly so it can support all the decorations.
Online retailers like Amazon usually have a variety of clear plastic domes suitable for this recipe. Try these Plastic Domes.

Sign up for our free newsletter and never miss a recipe!
Plus, you'll get a free eBook: 15 Minute Vegan Dinners!
⭐⭐⭐⭐⭐ If you love this recipe, please leave a five-star rating and review in the comments below! And if you make any modifications, let us know how it went so that we can all benefit from your experience. Happy cooking!
📖 Recipe
Snow Globe Cookies
Equipment
- mixing bowl
- Electric mixer
- Rolling Pin
- cookie cutters
- Plastic Domes
Ingredients
For the sugar cookies
- 4 cups all-purpose flour 475g
- 1 teaspoon baking powder
- ½ teaspoon salt
- 1 cup unsalted butter 227g, at room temperature
- 1 cup granulated white sugar 200g
- 2 large eggs
- 2 teaspoons vanilla extract
For the snow frosting
- ⅓ cup unsalted butter 75g, at room temperature
- ½ teaspoon vanilla extract
- 2 cups powdered sugar 250g
- 1 teaspoon milk
To decorate:
- Clear plastic domes you can buy small slushy lids on Amazon
- 3D edible Christmas character decorations
- Shredded coconut or edible glitter
Instructions
- Sift the flour, baking powder and salt into a medium mixing bowl. Set aside.
- In a large mixing bowl (or the bowl of a stand mixer with the paddle attachment), beat the butter and sugar together with an electric mixer for about 2 minutes or until light and fluffy.
- Beat in the eggs, one at a time, scraping down the sides of the bowl as needed. Beat in the vanilla.
- Gradually add in the flour mixture, a little at a time, until it's all mixed in.
- Divide the dough in half, shape into two flat rounds, and wrap them in plastic wrap. Chill in the refrigerator for 2 hours or overnight. (TIP: If you are chilling for longer than 2 hours, the dough will need to sit at room temperature for 30 minutes to soften slightly).
For the frosting:
- In a large bowl, beat the butter with an electric mixer until smooth, then beat in the vanilla. Sift in the icing sugar and add the milk, then beat until thick and smooth. If necessary, add a little milk or icing sugar to get the right consistency. Refrigerate until ready to use.
To bake:
- Preheat the oven to 375°F / 190°C. Line cookie sheets with parchment paper or silicone baking mats.
- Lightly flour the work surface, then roll out the dough to about ¼-inch thick.
- Cut out circles slightly larger than your plastic domes.
- Re-roll as needed for more sugar cookies.
- Place the circles of dough onto the prepared cookie sheets, at least 1 inch apart.
- Bake for 10 minutes or until the edges start to turn slightly golden.
- Allow the cookies to cool for a few minutes on the cookie sheets then transfer to a wire rack and cool completely.
To decorate:
- When the cookies are cooled, spread them with the frosting.
- Add in the Christmas character decorations. Top with the clear plastic dome. TIP: I like to serve them with a dish of shredded coconut and let the kids sprinkle it into the domes like 'snow'.
Notes
- Chill and Roll: Chilling the cookie dough is crucial for easy handling. Roll out the dough on a lightly floured surface to prevent sticking.
- Perfect Circles: Use a round cutter slightly larger than your plastic domes to ensure a snug fit.
- Room Temperature Frosting: Let the frosting sit at room temperature for a few minutes before spreading for smoother application.
- Get Creative: Experiment with different Christmas characters and decorations to make each cookie unique.
Nutrition
The nutritional information provided is approximate and can vary depending on several factors, so is not guaranteed to be accurate. Please see a registered dietician for special diet advice.
Sara says
Turned out perfectly! I got some lids from my local corner store for free, and made them for the kids on the day we put up the tree. They were a hit. Really good sugar cookie dough too.
TAYLER ROSS says
I've was looking for a new and fun cookie to make for my cookie trays and found this on Pinterest! So fun and festive!
Beth says
These are so cute! I love that all it takes is a little plastic cup topper to turn frosted cookies into snow globes.
Carrie Robinson says
Oh my goodness! This is just the cutest, most creative idea I have seen for a holiday cookie. 🙂 Fun
Shelby says
These are officially the cutest cookies ever! Perfect for the kids at holiday parties, and easy to make too.